When you purchase through links on our site, we may earn an affiliate commission.Heres how it works.
The increasing sophistication of camera phones like theiPhone 16can feel like a mixed blessing.
While getting more photographic power is always nice, this can also bring head-scratching complexity.
The Grid and Level tools (above left) are helpful composition tools. ‘View Outside the Frame’ can also be useful for street photography. The photo on the right follows the rule of thirds.
Not all of these prefs are immediately obvious or turned on by default.
Firstly, go toSettings > Cameraand scroll down toComposition.
see to it bothGridandLevelare turned on.
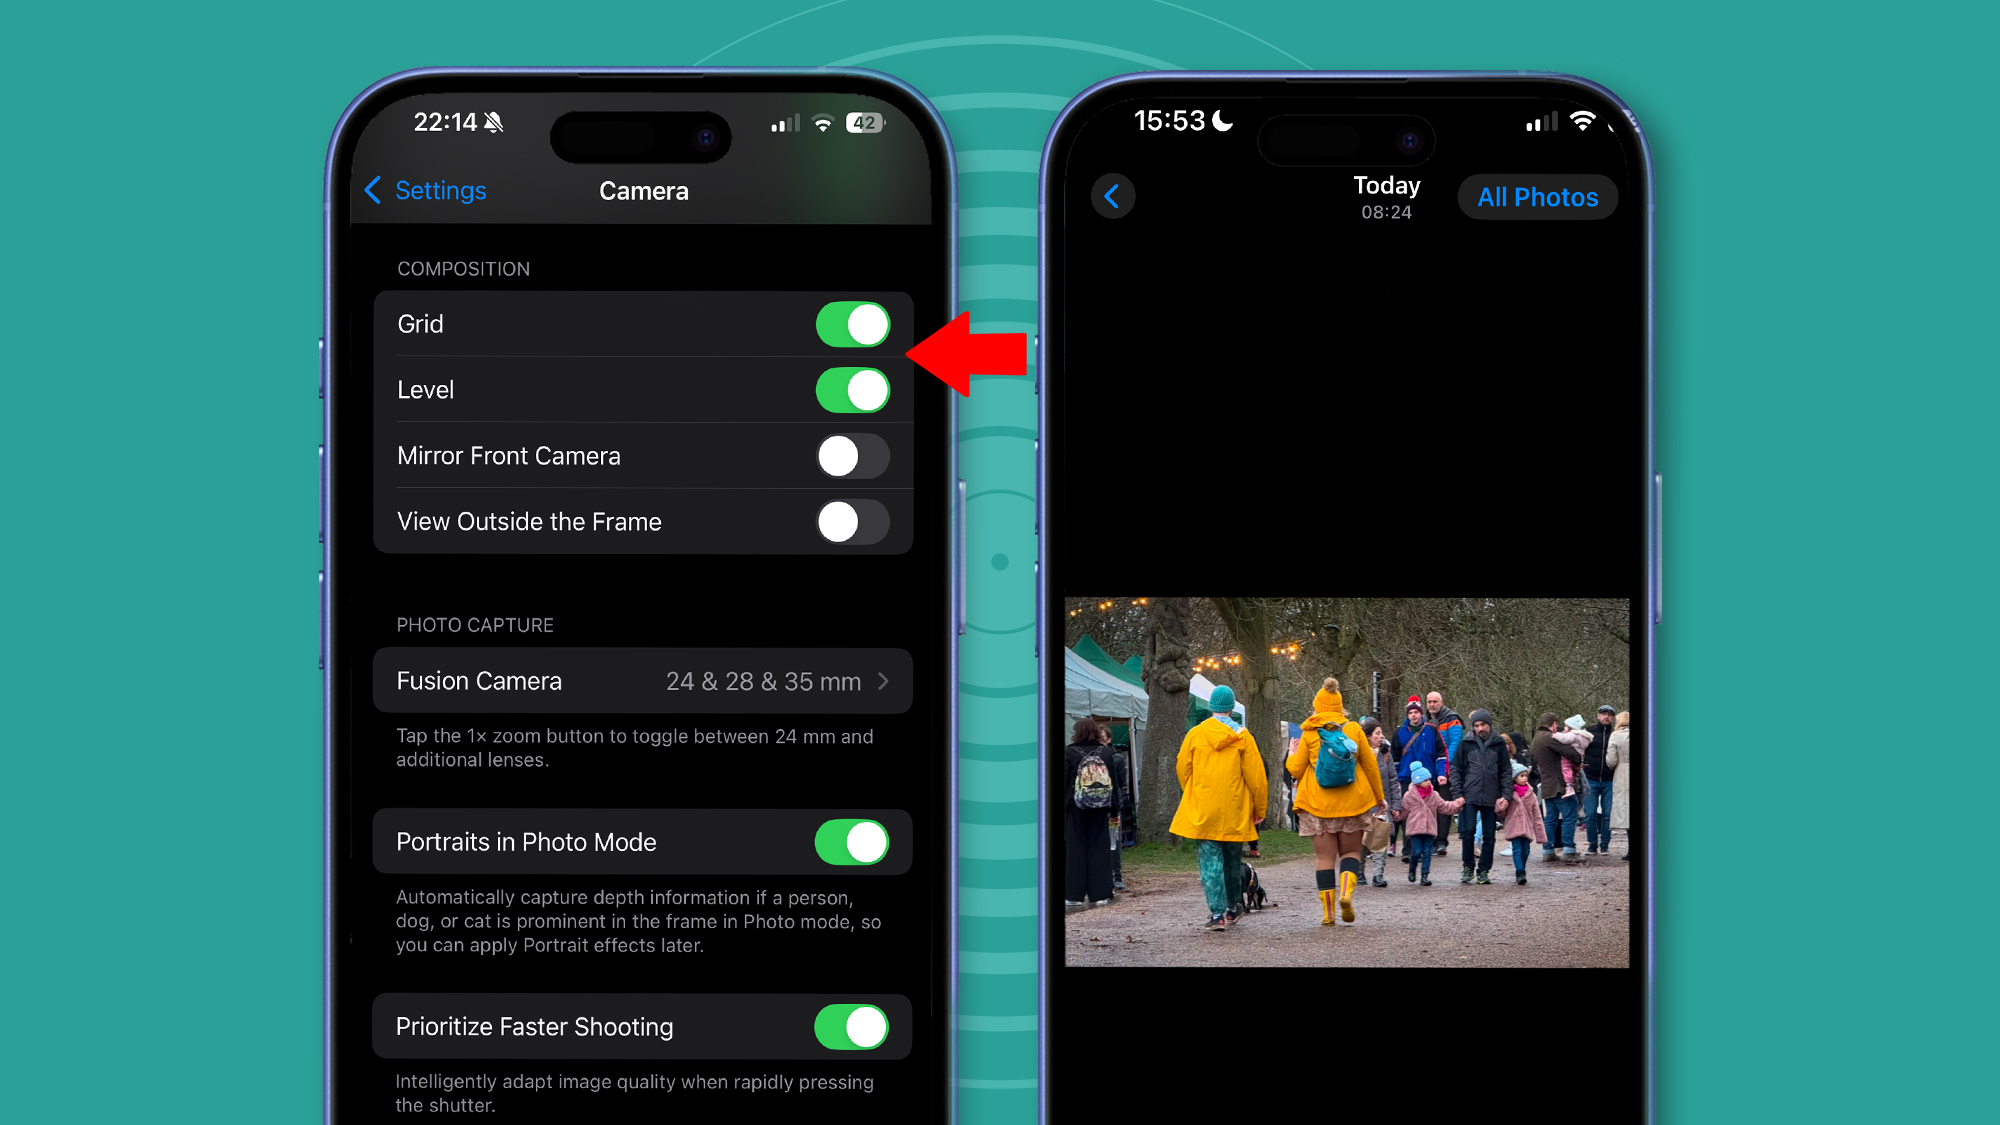
The Grid and Level tools (above left) are helpful composition tools. ‘View Outside the Frame’ can also be useful for street photography. The photo on the right follows the rule of thirds.
The next time you frame a shot, place interesting subjects or focal points where those four lines meet.
It will give your photos a natural tension, particularly when combined with other techniques likeleading lines.
Similarly, the Level is effectively a spirit level to double-check your horizons are straight.
But it’ll help add some polish to your landscape shots.
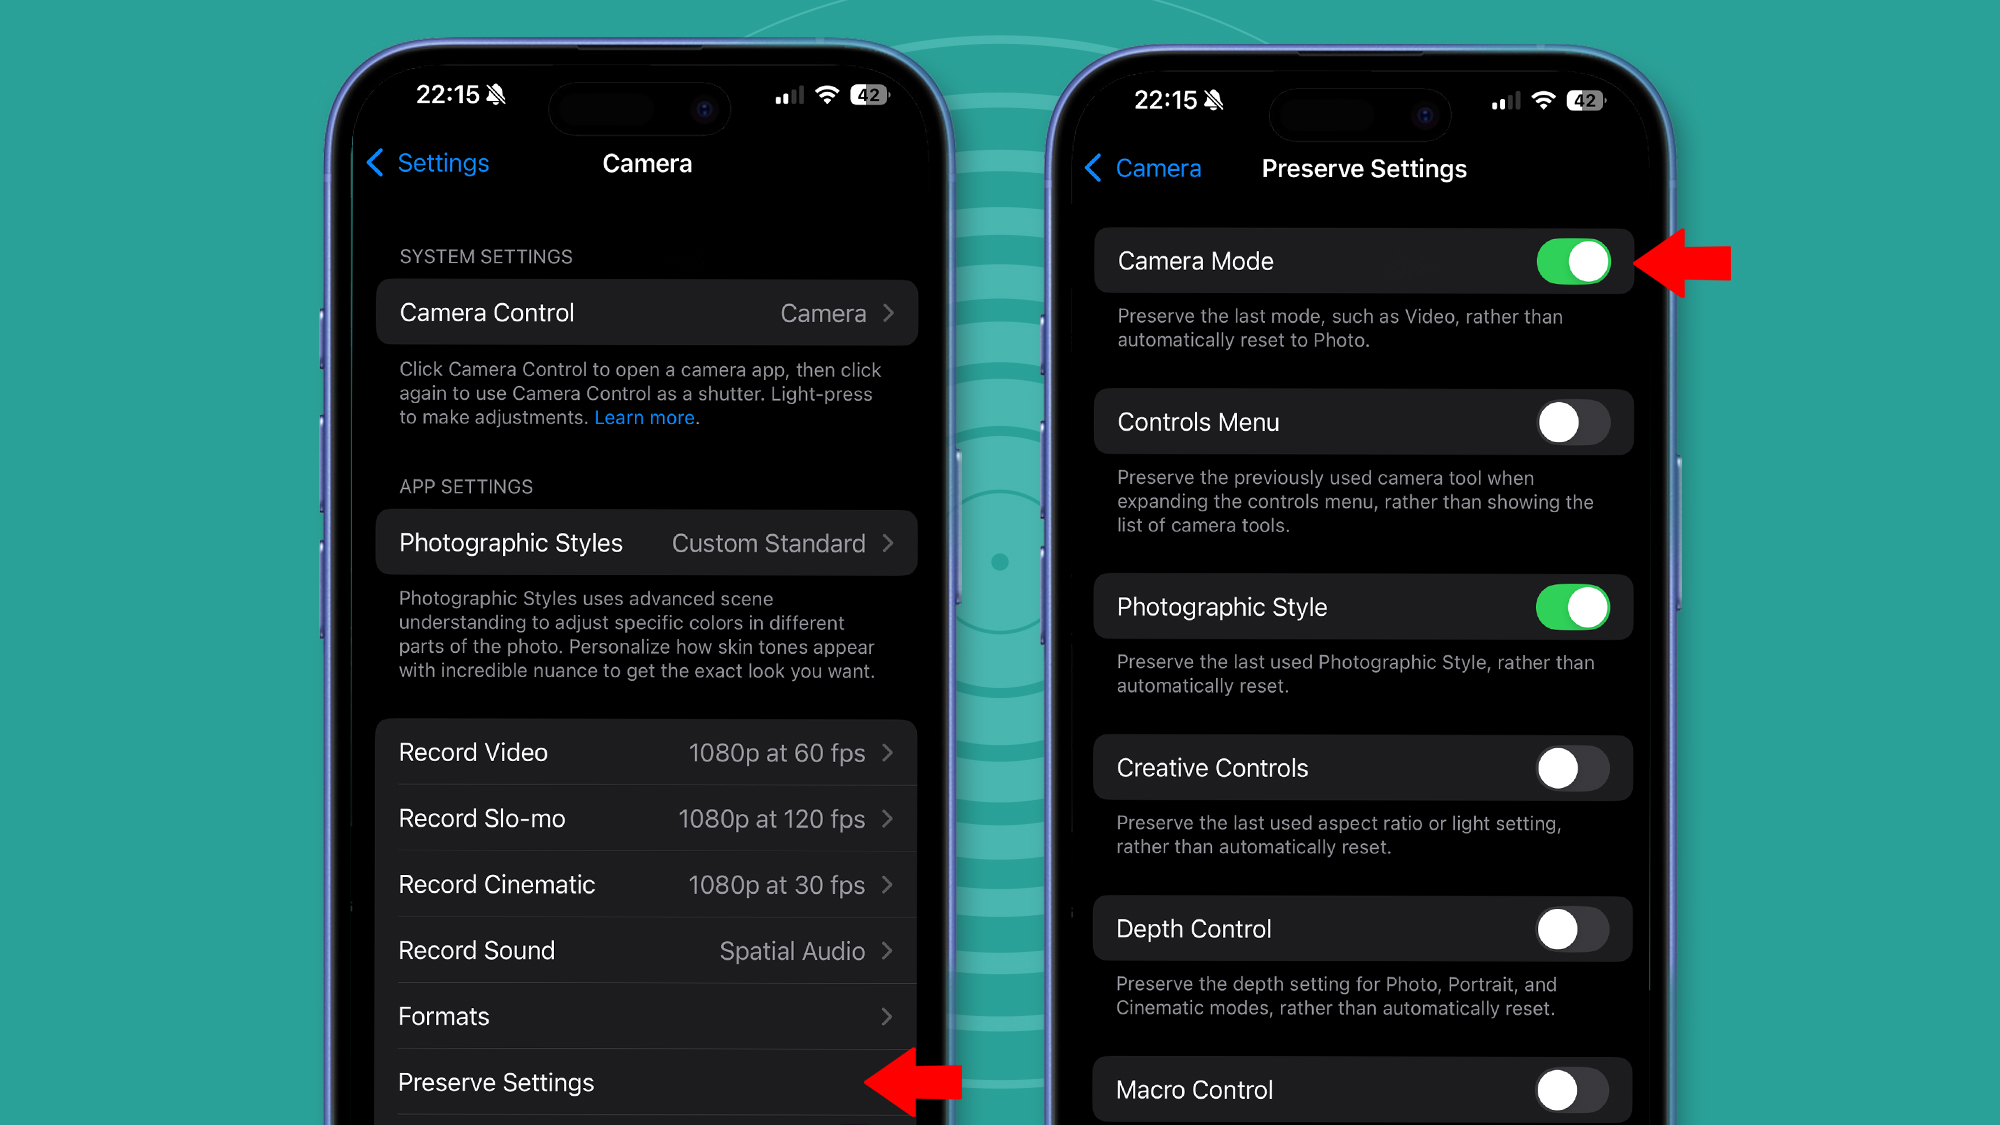
Lastly, go toSettings > Camera > Preserve Settingsand turn on some of your favorite camera modes.
That way, whenever I initiate the Camera app I know exactly where I’ll be tweaking from.
There are a few more things you could do.
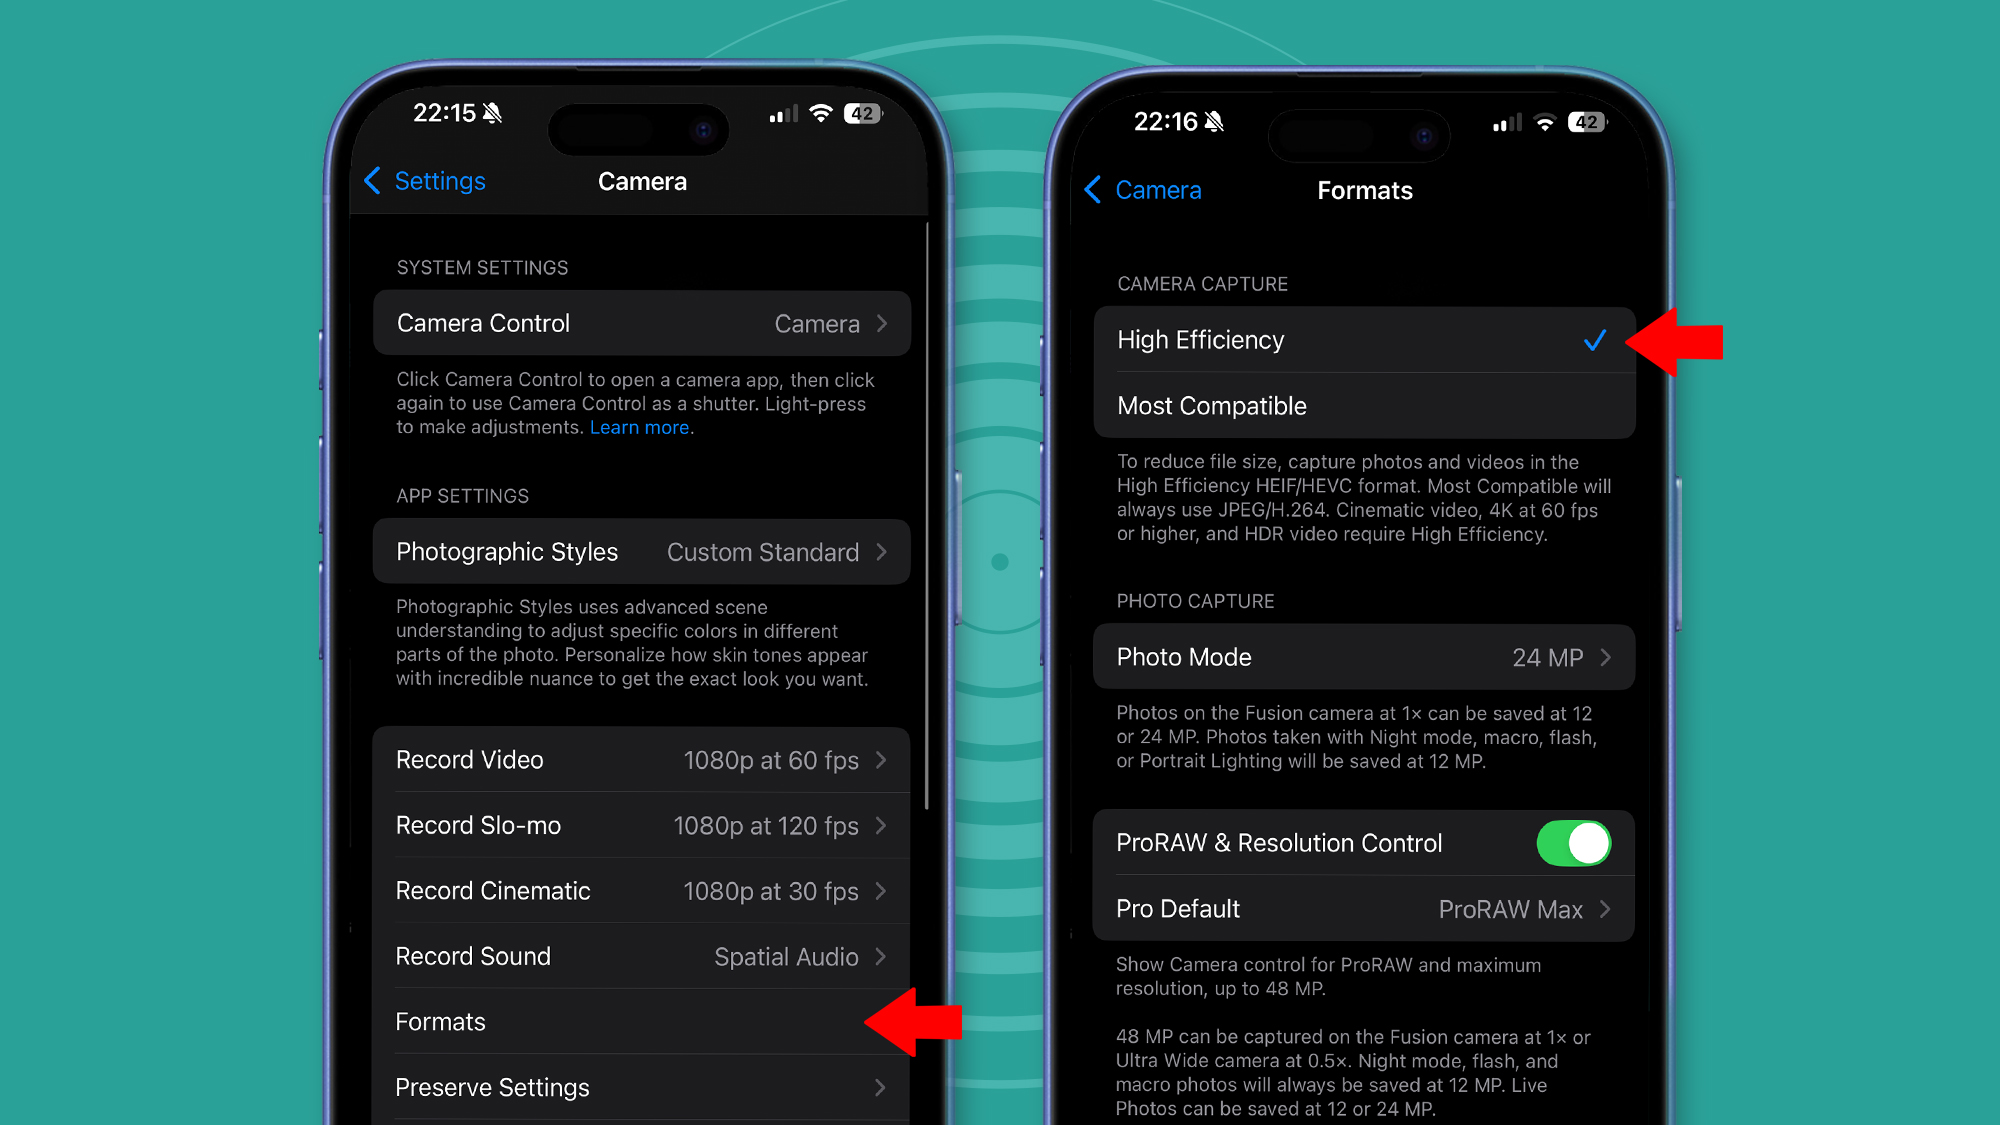
Firstly, there’s the dull but necessary task of choosing the best photo file formats.
I use both depending on the situation.
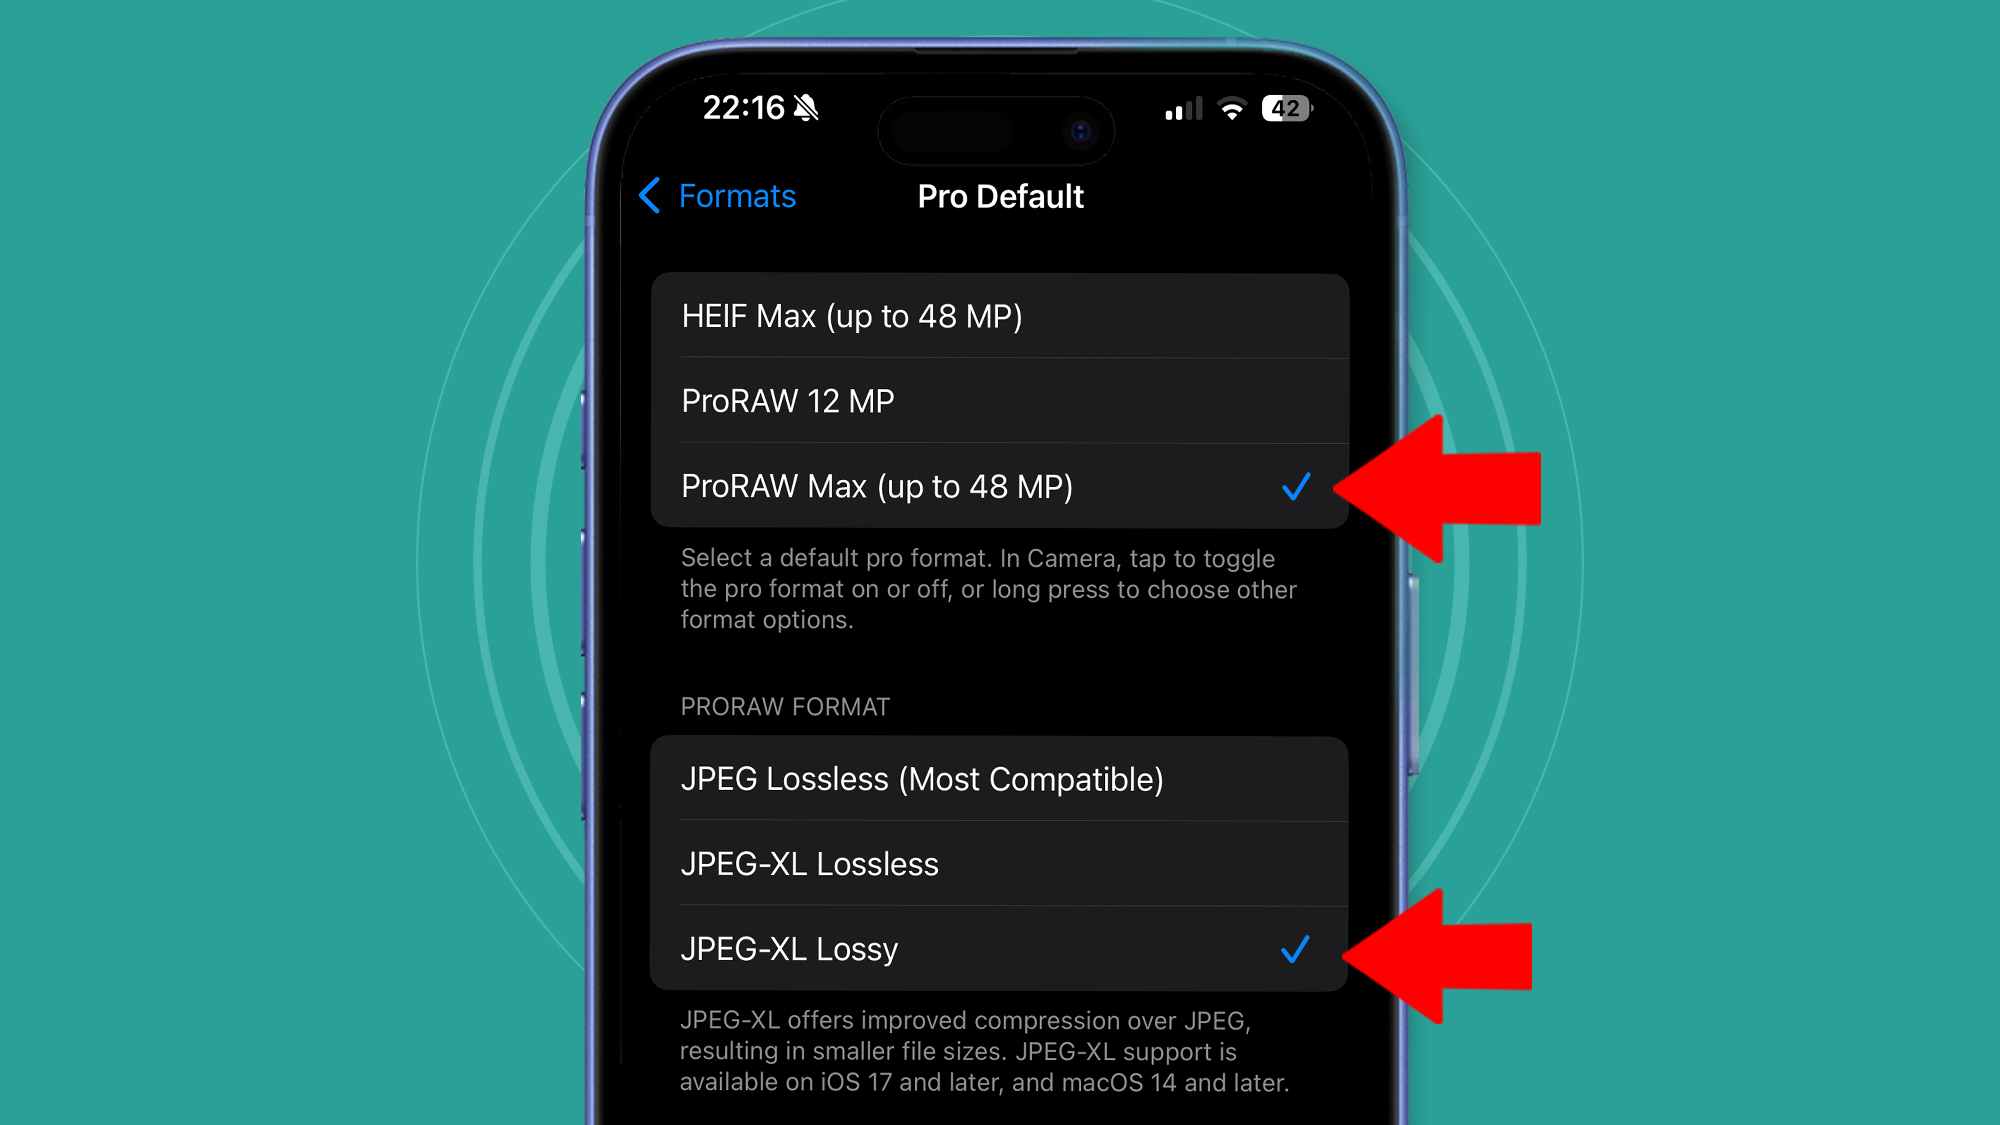
That isn’t possible with the ‘Most Compatible’ JPEG option.
What you choose here depends on how much editing you like to do.
This reduces file sizes by about 75-80% without a noticeable loss of image quality or resolution.
The ‘Amber’ Photographic Style (above) can give shots with yellow-orange tones with an extra hint of warmth.
How does this all work when you’re shooting?
Choosing a Photographic Style is very much down to both personal taste and the scene.
But one thing I tend to do with most of them isreduce the ‘tone’by somewhere between -40 to -70.

To tweak your Photographic Styles, use the grid and pull the dot (above left) down to reduce the ‘tone’ or move it horizontally to change the ‘color’.
That’s handy if you’re going for less of a ‘phone-like’ look.
It’s fiddly but gets easier with practice.
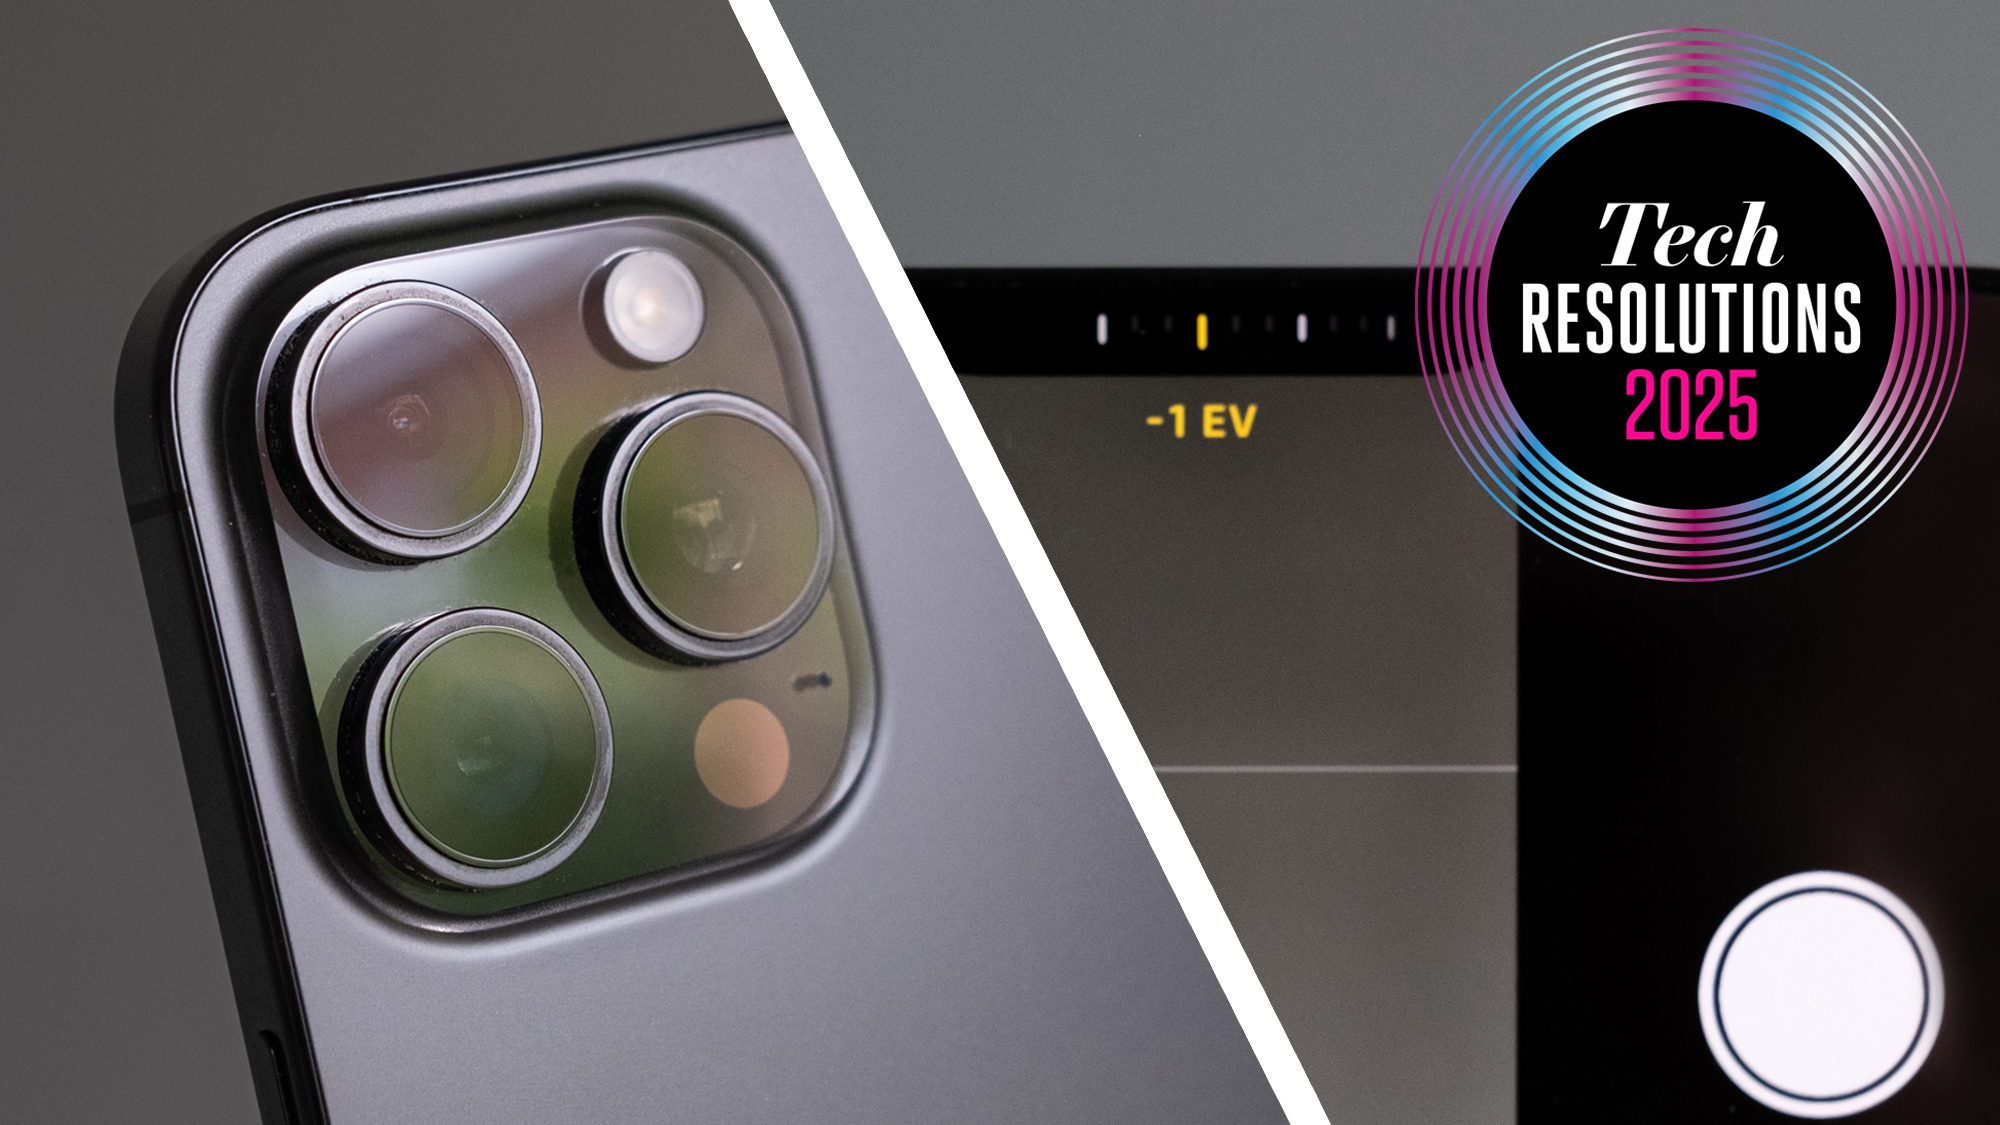
This is part of a series of features about new year tech projects and challenges for 2025.
The ‘Stark B&W’ Photographic Style (above) can give photos with defined shapes a more graphic quality thanks to the high contrast.
Read all of ourTech Resolutions articles here.
Fortunately, there are ways to tweak it to make it work better for you.
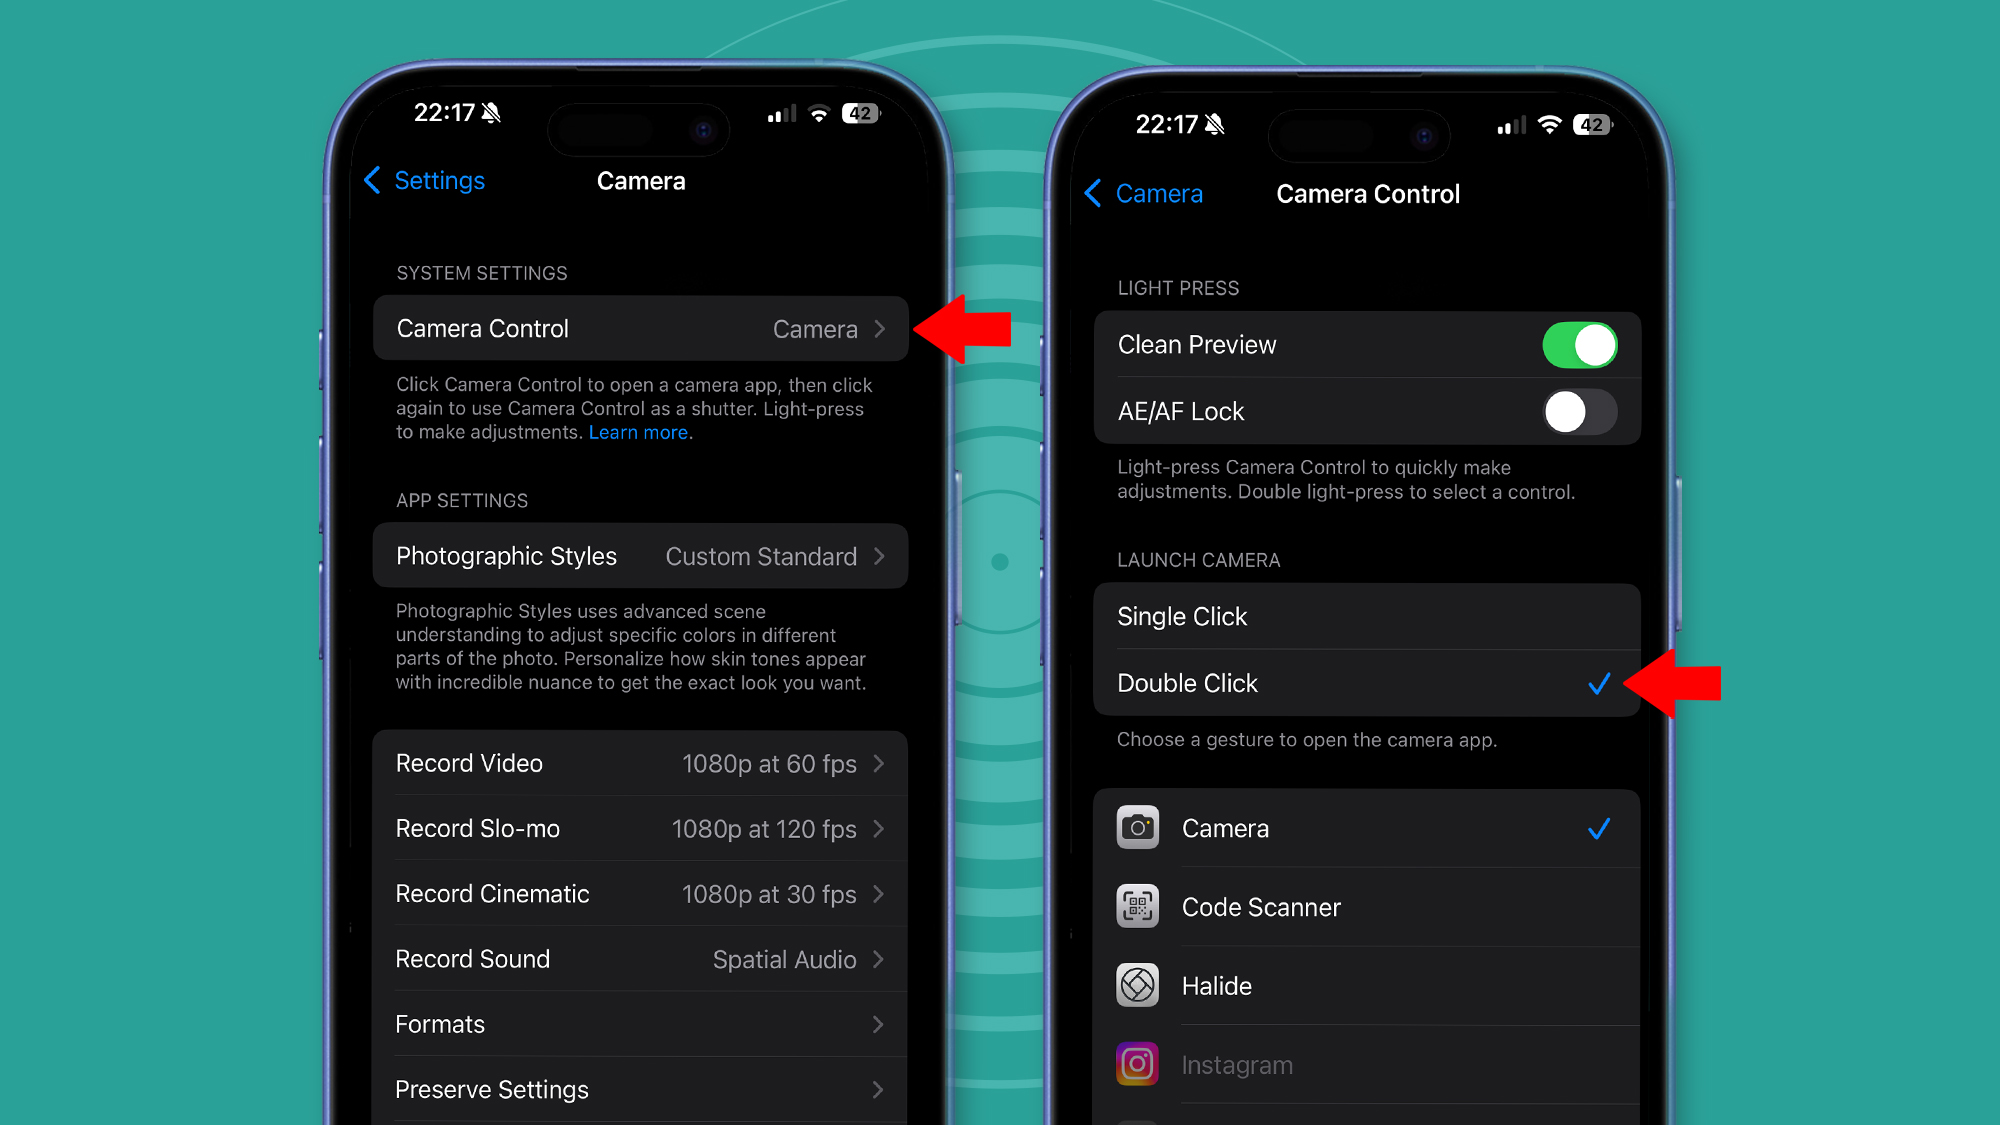
For starters, go toSettings > Camera > Control Control.
A wave of relief will wash over you.
Now scroll down to theAccessibility menuat the bottom (see below).
Next, it’s time to decide what the Camera Control button actually does beyond acting as a shutter.
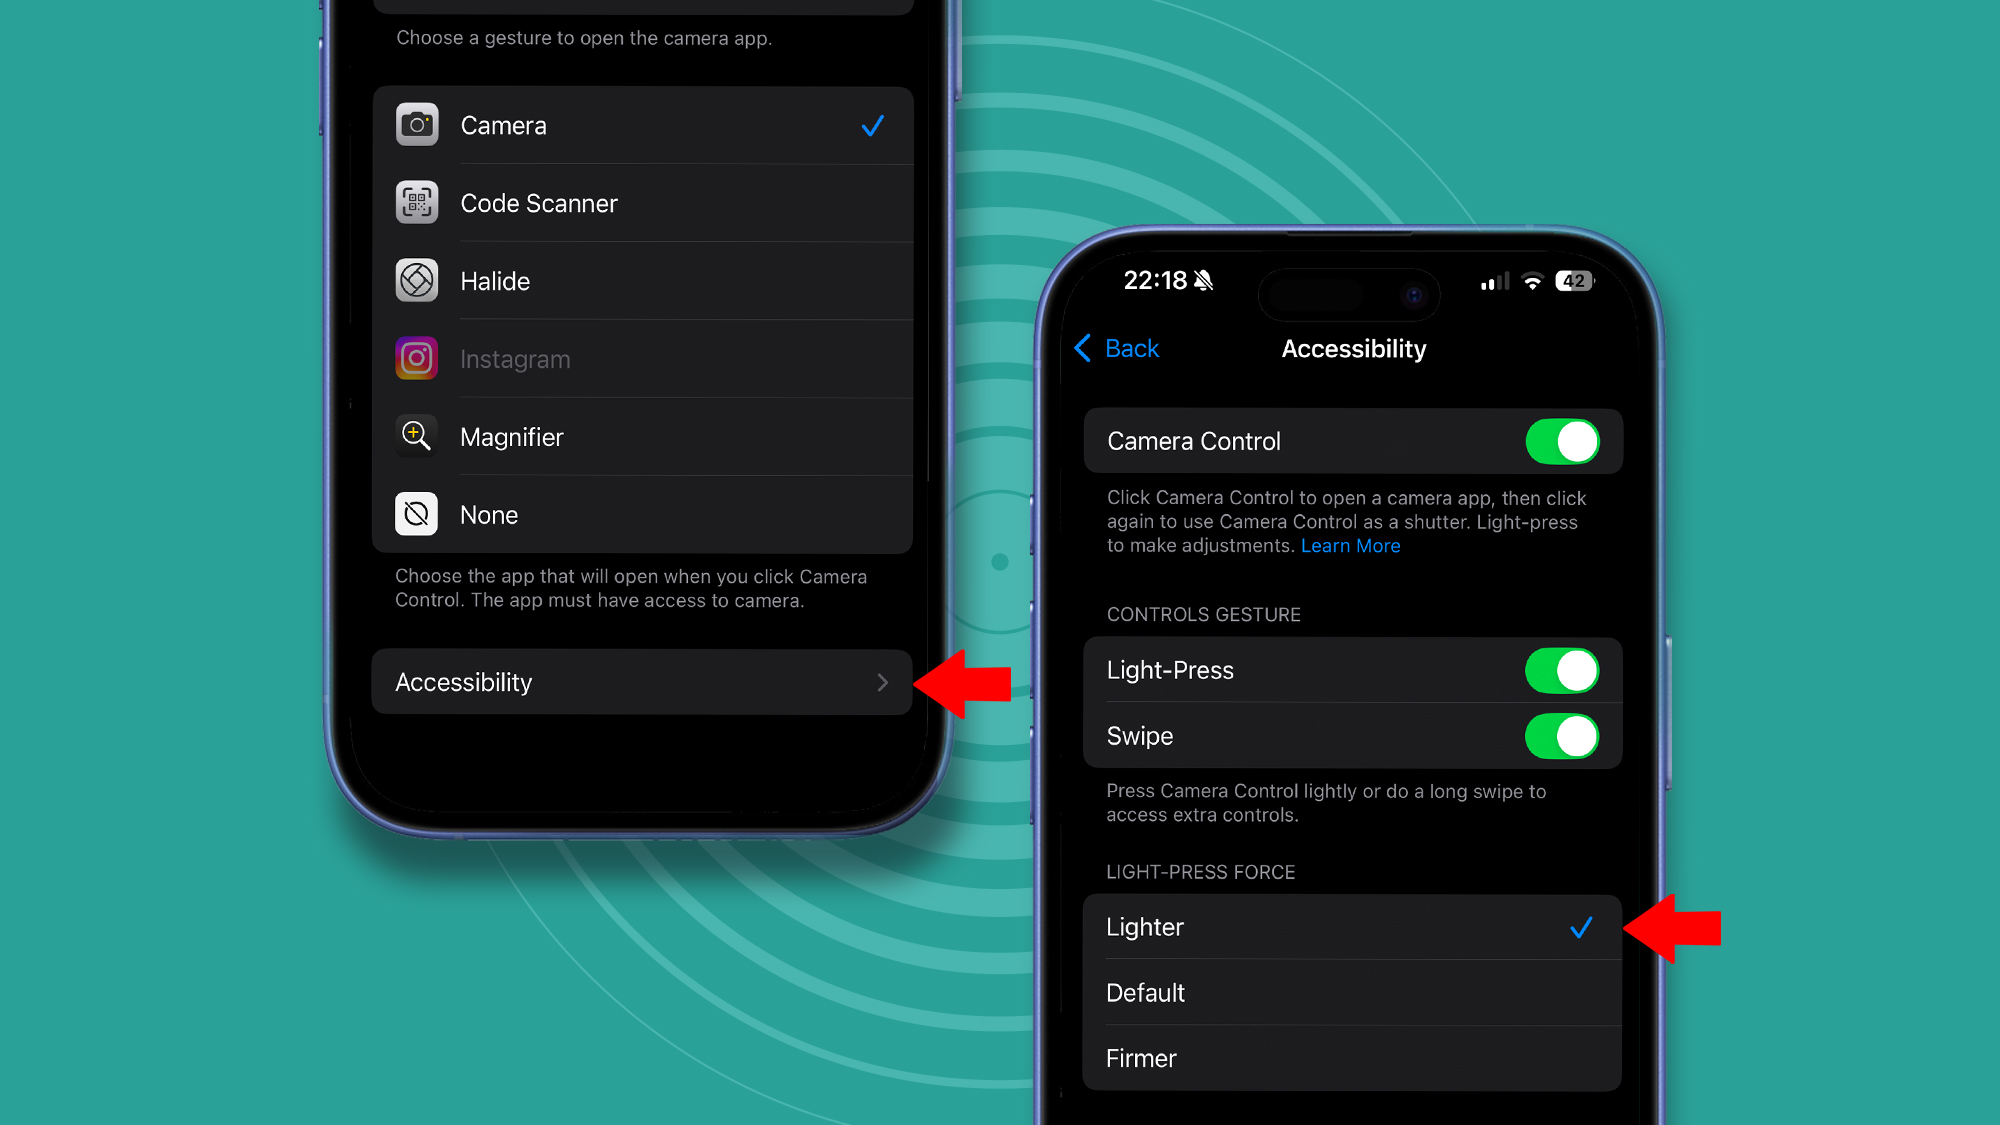
Your options are Exposure, Depth, Zoom, Cameras, Styles and Tone.
It’s great to have something similar on a phone and that’s my default choice for Camera Control.
The big one is raw photo editing.
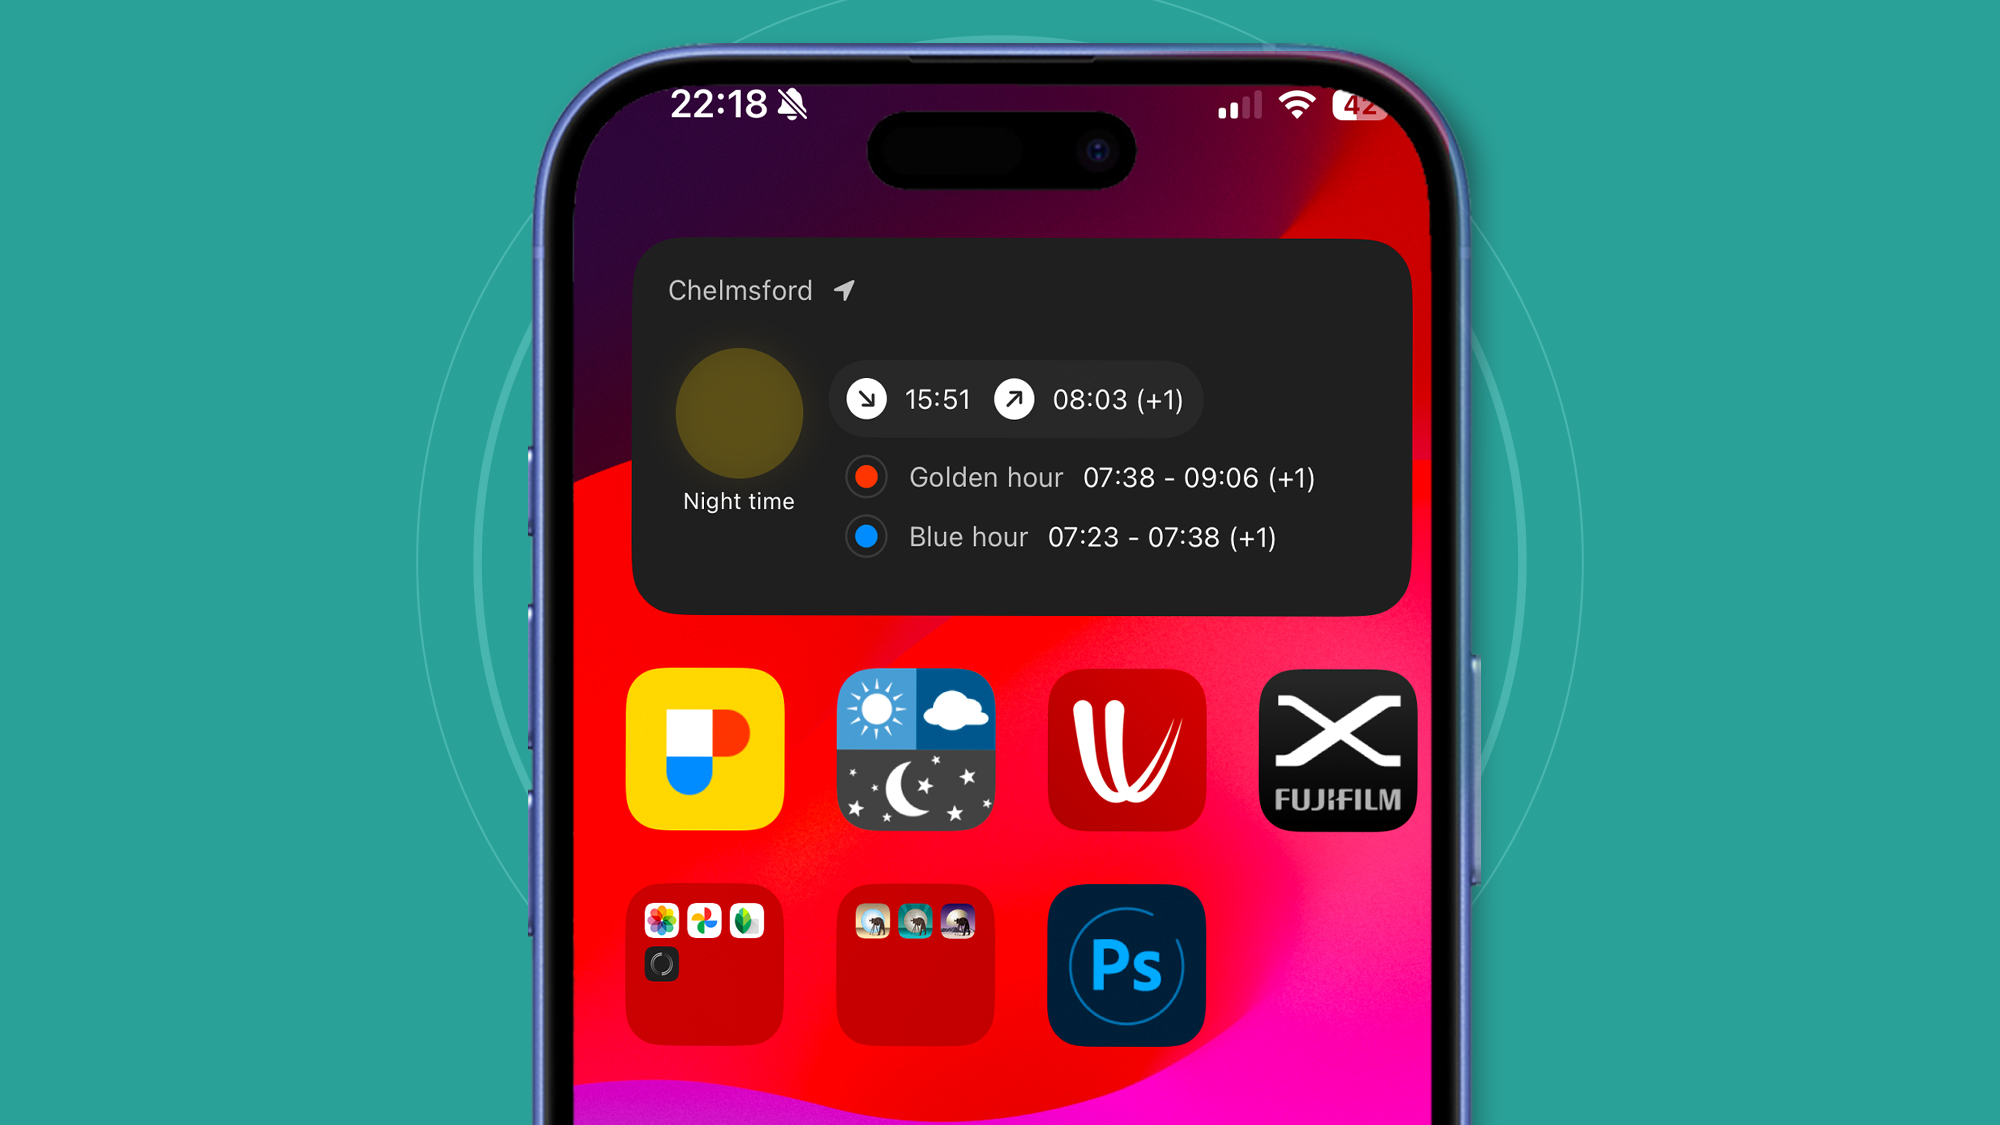
The Photopills iOS widget (above, top) gives you the times for golden and blue hour. Below that (from left to right), Photopills, Clear Outside and Windy are all handy ways to find out when and where to take photos.
But for editing raw DNG files I still useLightroom(see below).
A good free alternative isSnapseed.
I also useWindyandClear Outsideto keep an eye on clouds, rain, and the potential for mist and fog.
Apps like Halide (used for the above) have tools like manual focus to help you take more abstract or creative photos.
One of my own tech resolutions is to giveViewfindr, which gives you handy weather alerts, a spin.
